


Chicky Tamagoyaki Bento Salad
March 13, 2015
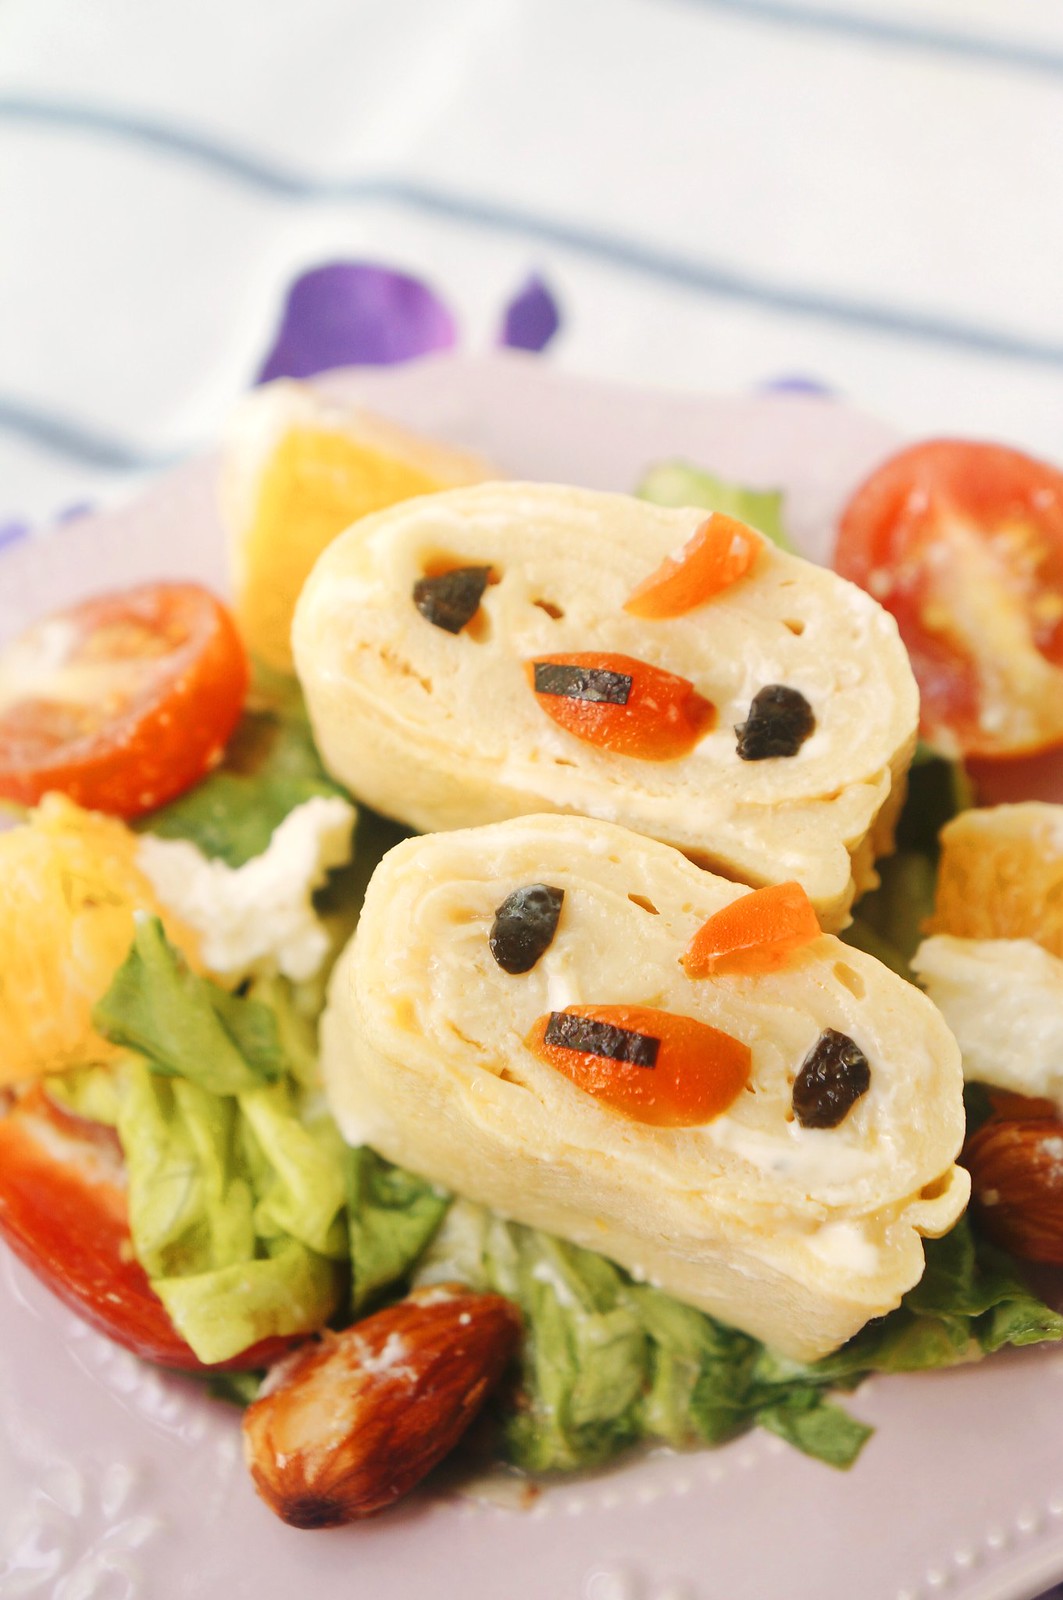
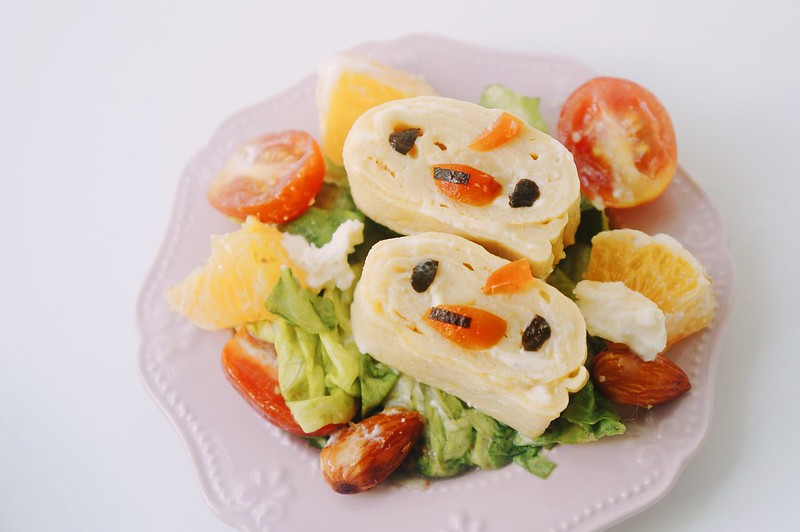
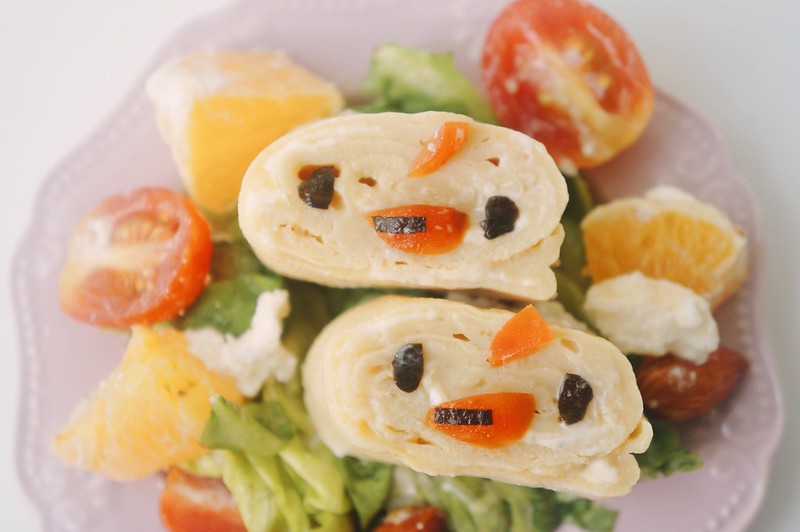
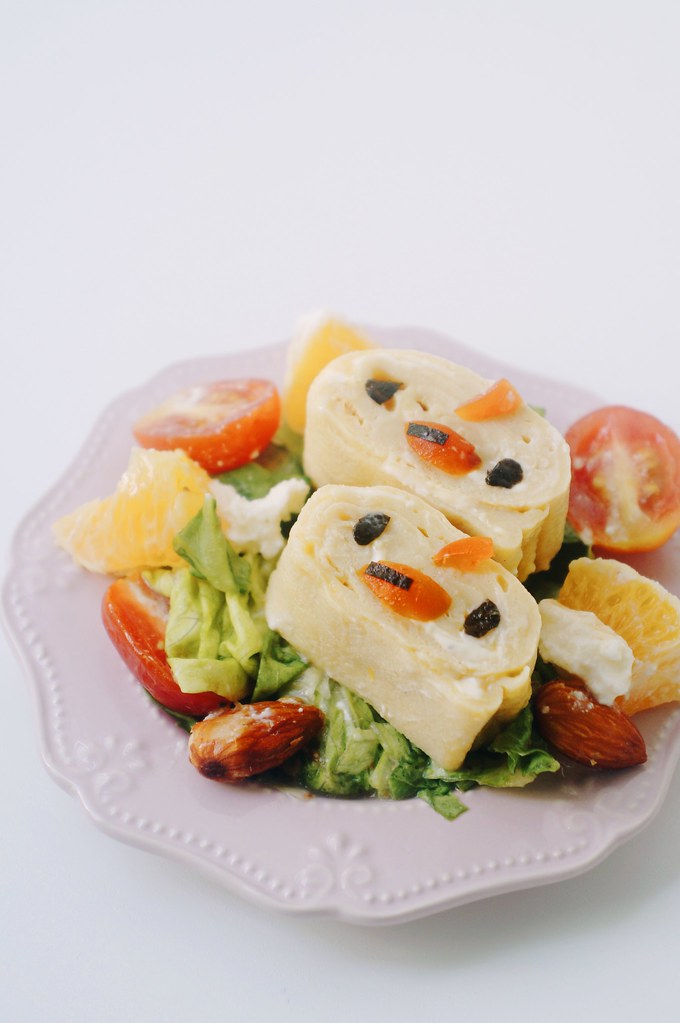
Hi! I'm back with another recipe that's great for bentos! The stars of the show are the chicks made from tamagoyaki (Japanese version of an omelette). I gave a spin to the traditional tamagoyaki with my original recipe, where I add cheese to form a savory and cheesy Japanese omelette. Umami~

This tamagoyaki recipe was born because I had a severe craving for tamagoyaki, but I ran out of the typical Japanese seasoning like mirin and dashi stock. To make up for the taste, I replaced those ingredients with cheese. Personally, I like the sliced cheese infused with flavours like garlic and herbs. However, you can stick with the original flavoured sliced cheese.
I prepared some salad to go along with the cheesy tamagoyaki. It was a satisfying and healthy meal! Here are the recipes for the salad and tamagoyaki.
Citrus Salad Recipe adapted from SORTED
Ingredients
Baby butterhead lettuce
Almonds, macadamia, or any of your favourite nuts
1 Orange
Cream cheese
Baby tomatoes
Salt and pepper
3 Tablespoons of Olive oil
1 Tablespoon of Vinegar
1 Tablespoon of Soy Sauce

Instructions
1. Wash and slice the leaves of the baby butterhead
2. Skin the orange. Keep 4 slices, and squeeze the rest to collect the orange juice. Cut the 4 slices of oranges into smaller pieces.
3. Combine the orange juice with the olive oil, soy sauce, and vinegar. Mix well, and add salt and pepper to taste, forming the salad dressing.
4. Add the salad dressing to the baby butterhead leaves, sliced oranges, nuts, baby tomatoes, and bits of cream cheese.
Your salad is now complete! Time for the tamogayaki!

Cheesy Chicky Tamagoyaki Recipe
Makes five chicky tamagoyaki
Equipment
Tamagoyaki Pan (Rectangular shaped non-stick pan)
Ingredients
3 Eggs
2 Tablespoons of Shoyu (Japanese soya sauce)
2 Tablespoons of Sugar
2 Slices of Cheese
Dried seaweed (nori)
Baby tomatoes
Instructions
1. Crack the eggs in a bowl and beat well. Meanwhile, divide each sliced cheese into 4 pieces and set aside.
2. Add shoyu and sugar, mix until fully combined
3. Grease a tamagoyaki pan with a bit of cooking oil and heat it up over low heat
4. Pour 1/5 of the beaten egg mixture into the pan and spread it out evenly. Once it is just cooked, roll it up like sushi, leaving just a bit unrolled.
5. On the bit of egg that is not yet rolled, lay the sliced cheese. Roll the egg completely and push it to one side of the pan.
6. Pour another 1/5 of the beaten egg mixture and spread it evenly, ensuring that it spreads under the rolled up egg that was made in step 5.
7. Repeat steps 5 and 6 until all the egg mixture has been added.
8. Remove the tamagoyaki from the pan and wrap it in food wrap. Shape it slightly and let it cool.
9. From the seaweed, cut out ovals for the eyes and a line for the mouth.
10. Slice the tips of the baby tomatoes, and further slice them in half to form the beaks. Cut out triangles from the baby tomatoes for the comb.
11. Using mayonnaise/sauce, adhere the facial features to the tamagoyaki to form the chicks...
And there you have it, yummy and cheesy chicky tamagoyaki to go with salads or bentos!


0 comments