Tokyo Banana Roll Cake Recipe
January 08, 2016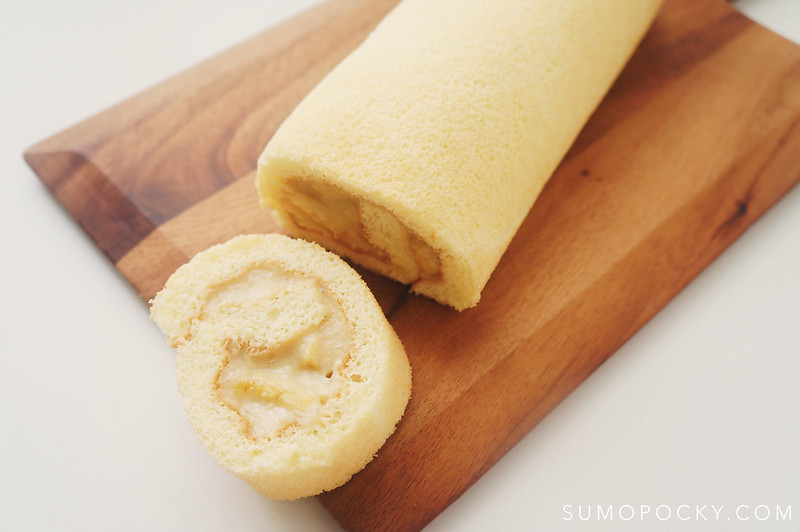
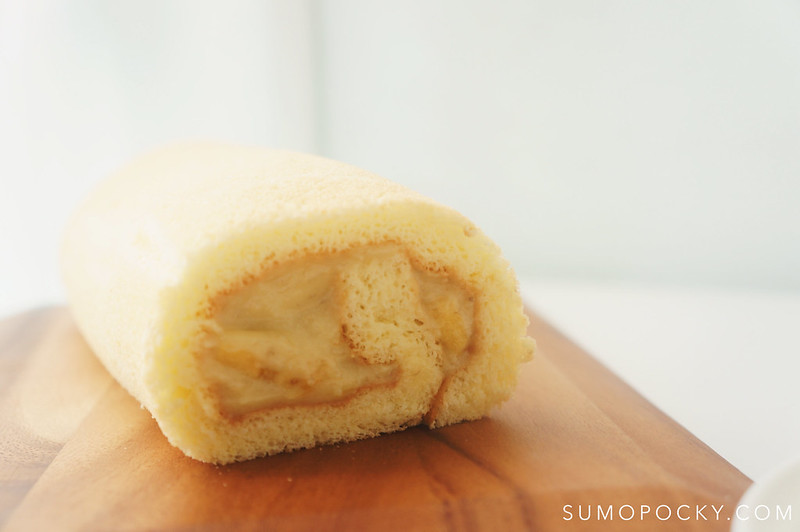
One of the must-buy Japanese snacks is Tokyo Banana. This Omiyage has won over the hearts of many Singaporeans, to the extent that there are numerous local shops selling this snack that was previously only available in Japan.
Why is the Tokyo Banana so highly raved? It is not just any sponge cake filled with banana custard. It is THE sponge cake filled with an awesomely SMOOTH BANANA CUSTARD. It has just the right amount of flavour and sweetness, thus appealing to those who are not usually fans of bananas.
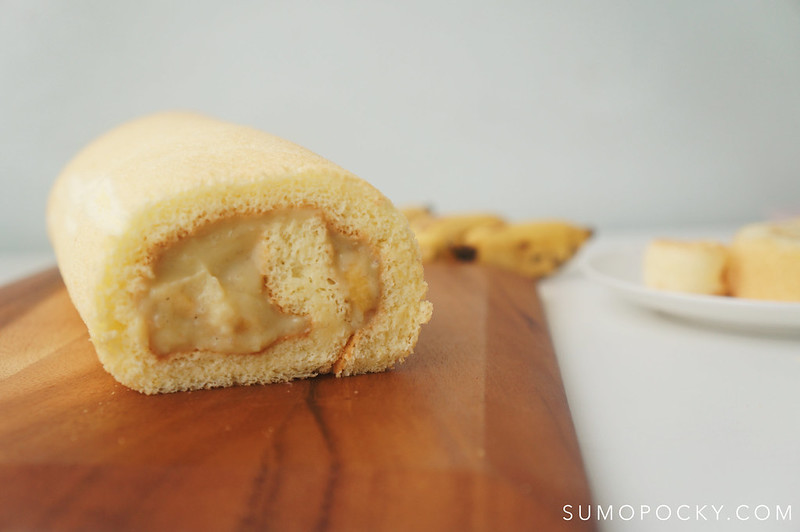
With the weakening of the Yen and strong efforts to boast the country's tourism, Japan has been gaining popularity as a tourist destination. While I long to return to Japan again, in the meantime, I can satiate my cravings with this Tokyo Banana recipe in the form of a roll cake!
As with any other banana dessert, the taste of the fruit is best brought forward with a super ripened banana. For this Tokyo Banana recipe, I waited for my bananas to turn brown before using them; Boy, was it worth the wait. So quick tip if you are planning to make Tokyo Banana - buy bananas a few days in advance.
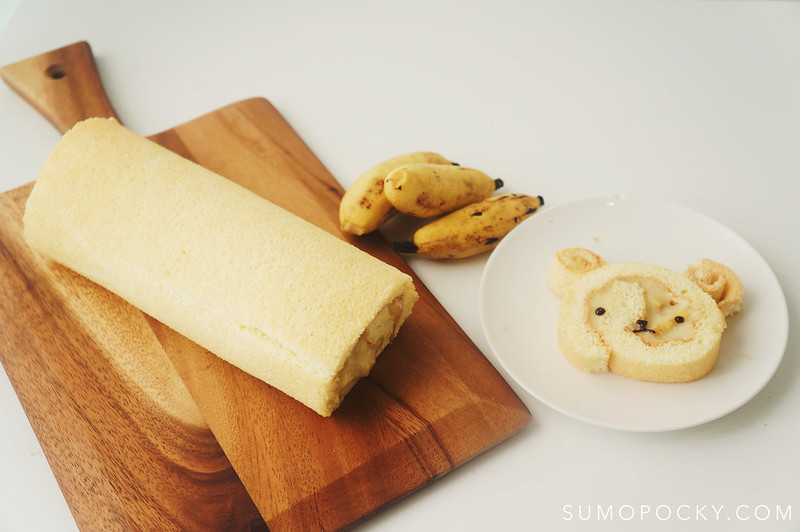
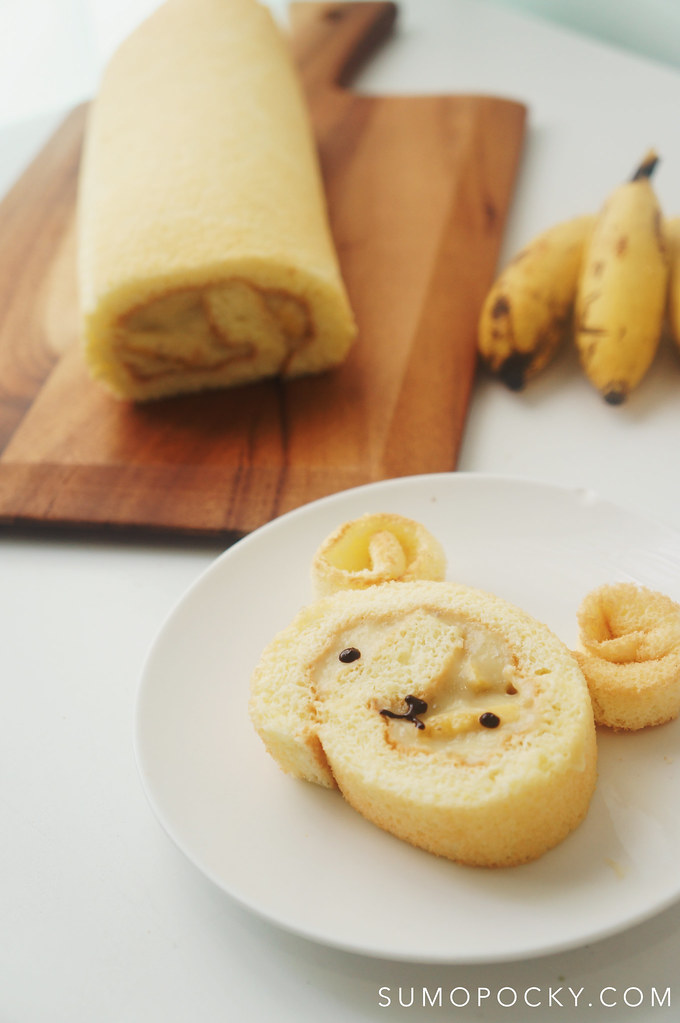
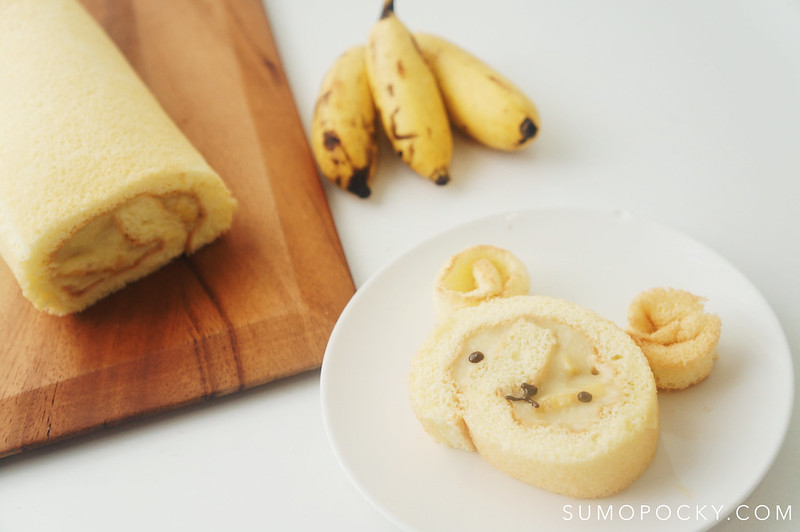
This Tokyo Banana Roll Cake is best eaten chilled and good to serve on its own. However, if you want to take it a step further, you can decorate the cake slices as cute bears. A small dedication to the land of kawaii (cuteness). This also helps to reduce food wastage, as the bear's ears were made using trimmed cake sides!
 TOKYO BANANA ROLL CAKE RECIPE
by Sumopocky
Equipment: 27 x 27 cm Baking tray
Ingredients
[For Banana Custard]
2 egg yolks
200ml of Fresh Milk
70g of Caster sugar
15g of Cake flour/Top flour
1.5 - 2 ripened bananas (the riper, the better! adjust quantity according to your taste)
[For Sponge Cake]
Adapted from Cooking with Dog
4 Egg whites
40g of Caster sugar
4 Egg yolks
40g of Caster sugar
1 - 2 drops of Vanilla essence
45g of Cake flour
1 - 2 sliced Bananas
2 tbsp of Hot water
1 tbsp of Caster sugar
[For Decorating] *Optional
Melted chocolate
Sides of Sponge cake
Directions
[For Banana Custard]
1. In a large bowl, mash the bananas with a whisk or fork.
2. Add half the portion of milk and the 2 egg yolks. Mix well.
3. Stir in the caster sugar, followed by flour.
4. In a pot, bring the remaining portion of milk to a simmer.
5. Pour the heated milk to the mixture in a steady stream while mixing continuously.
6. Strain the mixture through a sieve. Mash the banana lumps through the sieve.
7. Transfer it to a pot on low heat. Mix continuously until the custard thickens. The right consistency is when you can draw an "infinite" sign with the custard. Remove from heat and cover with a cling wrap (make sure cling wrap is touching the surface of custard) or transfer to a piping bag. Chill it in the fridge.
[For Sponge Cake]
1. To make the meringue, beat egg whites and sugar in a mixer on low speed. When it starts to get frothy, increase to medium. Beat till stiff peaks form.
2. In a separate bowl, beat the egg yolks, caster sugar, and vanilla essence until mixture becomes creamy.
3. Sift in the cake flour and mix till combined.
4. Add 1/3 of the meringue in Step 1 to the batter in Step 3. Use a balloon whisk to mix, and knock against the side of the bowl to let the mixture fall. Repeat till combined, all the while being careful not to break the air in the meringue.
5. Add another 1/3 of the meringue and fold in with a spatula. Use the same fold-and-knock motion. When combined, add the final 1/3 of meringue and fold-and-knock till combined. The batter should be smooth and shiny.
6. Transfer the batter to a baking sheet lined with parchment paper. Gently spread the batter evenly with a spatula. Be careful not to break the air when spreading!
7. Bake in a preheated oven at 170°C for 25 minutes. Let it cool before removing from the parchment paper. Trim off the sides (don't throw them away!)
8. Mix hot water with sugar to make the sugar syrup. Spread the sugar syrup on the cake to keep it moist.
9. Spread a layer of banana custard on the sponge cake. Line the cake with sliced bananas.
10. Make 3 small incisions on each side of the sponge cake and roll gently. Wrap the cake in parchment paper and chill it in the fridge for 1 - 2 hours. You can then slice, serve, and eat!
[For Decorating] *Optional
8. Mix hot water with sugar to make the sugar syrup. Spread the sugar syrup on the cake to keep it moist.
9. Spread a layer of banana custard on the sponge cake. Line the cake with sliced bananas.
10. Make 3 small incisions on each side of the sponge cake and roll gently. Wrap the cake in parchment paper and chill it in the fridge for 1 - 2 hours. You can then slice, serve, and eat!

[For Decorating] *Optional
1. Cut a slice of the roll cake. Lay it on a dish.
2. Use the sides of the sponge cake that were sliced off previously and roll the ends to a ball. This makes the ears. Use the sugar syrup to slightly stick it to the cake.
3. Draw on the face with melted chocolate. Your bear cake is now done!


3 comments
Made this today. It makes a lovely sponge and custard though next time I will reduce the sugar a little. Banana custard is too liquid to roll attractively though even though I cooked it out so I might adjust next time. Thank you for this though!! Very tasty!
ReplyDeleteThanks foor writing this
ReplyDeleteSelling Fullz , Leads, Database
ReplyDeleteBuy Freshly updated 2025
Contact:
Whats - app - +1.. 605.. 846... 1870..
Tele gram - (at) Fullzpros
E mail - datastreemer at gmail dot com
All info will be valid, fresh and not sold before
Replacement available for bad and invalid info
Samples only for bulk buyer
Payment upfront
Payment mode crypto
Available Everytime
Stuff listed below
---------------------------------------
USA SSN Fullz | Canada SIN Fullz | UK NIN Fullz |USA ID’s | DL photo
>REAL SSN
>BUSINESS OWNER LEADS
>SWEEPSTAKES AND GAMBLING LEADS
>MORTGAGE LEADS
>CRYPTO DATABASE
>FOREX DATABASE
>STOCK MARKET TRADER LEADS
>EDUCATION LEADS
>INSURANCE LEADS
>PAYDAY LOAN LEADS
>SWEEPSTAKES AND GAMBLING LEADS
>CASINO DATABASE
>HOME OWNERS LEADS
>EMPLOYEE LEADS
>USA BANK LEADS
>EIN FULLZ
many other stuff available